systemdのunitファイルの差分編集方法

systemdのunitファイルの差分編集する方法を初めて知ったのでメモ

ディストリビューションパッケージからインストールしたUnitファイルは、以下を行うことで設定の上書きが出来る

systemctl edit google-fluentd

[Service]
Environment='元の値(存在しなければ空)'
Environment='LOG_ELASTICSEARCH_HOST=dev-log-elastic01'

※そもそもsystemdで環境変数を見てくれないのを忘れていてハマりました

pythonでLINE BOTを作る

作成の記事自体は色々見つかるんだけど、LINE側のWebhockの値が異なっていたりしたので自分メモ
まずはリファレンスをちゃんと読もう!(自戒)

LINE Developers

https://developers.line.biz/ja/ から

BOTユーザーは別に作るので、ここへの登録は個人のLINEアカウントで問題ない

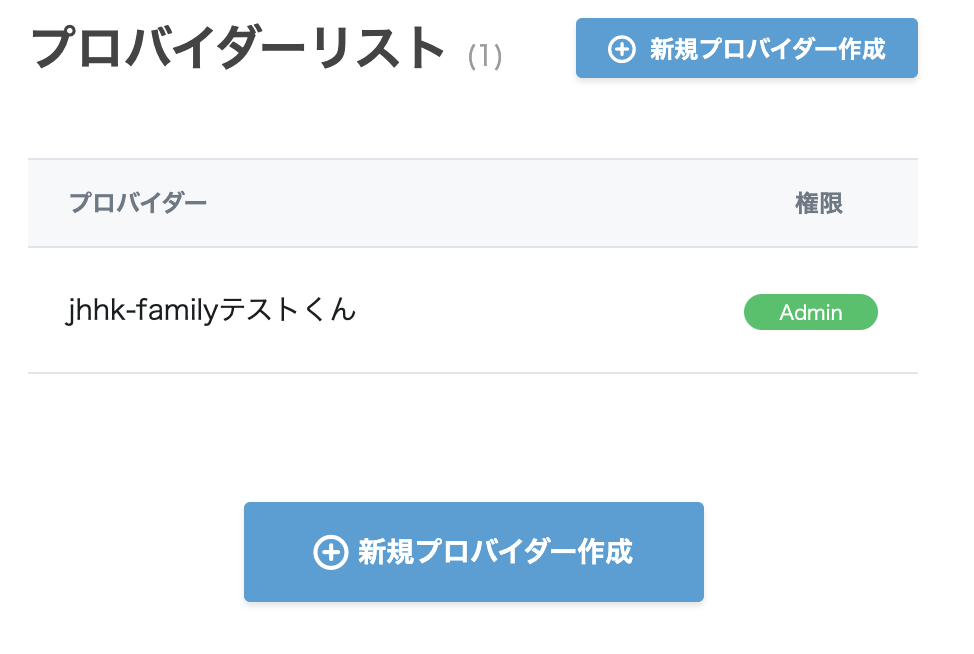
ログイン後、新規プロバイダーを作成する

次にチャンネルを作成する
今回は普通(?)のチャットボットを作るので、Massaging APIを選択する

必要な情報を入力してチャンネルを作成する

作成後に、アプリを作る上で必要な情報は
1. Channel Secret
2. アクセストークン (ロングターム)
の2つ

Webhook送信を有効にし、Webhookを受け入れるURLを入力する(httpsのみ)

botサーバー

nginx + flaskで作りました

OSの環境変数(.bash_profileなど)にLINE_CHANNEL_SECRETとLINE_CHANNEL_ACCESS_TOKENを設定します。
書いた後は反映を忘れずに!

export LINE_CHANNEL_SECRET=xxxxxxxxxx
export LINE_CHANNEL_ACCESS_TOKEN=xxxxxxxxxxxxxxxxxx

nginxのconfigにlocationを追加する

    location ~ /何かしら {
        proxy_pass http://localhost:8000;
    }

flask アプリケーションを作る

#!/usr/bin/env python3.7
import os,json
from flask import Flask, request, make_response
import base64
import hashlib
import hmac

from linebot import (
    LineBotApi, WebhookParser
)
from linebot.exceptions import (
    InvalidSignatureError
)
from linebot.models import (
    MessageEvent, TextMessage, TextSendMessage
)

channel_secret = os.getenv('LINE_CHANNEL_SECRET', None)
channel_access_token = os.getenv('LINE_CHANNEL_ACCESS_TOKEN', None)

if channel_secret is None:
    print('Specify LINE_CHANNEL_SECRET as environment variable.')
    sys.exit(1)
if channel_access_token is None:
    print('Specify LINE_CHANNEL_ACCESS_TOKEN as environment variable.')
    sys.exit(1)

line_bot_api = LineBotApi(channel_access_token)

# Flask
app = Flask(__name__)
@app.route('/line-bot/api',methods=['post'])

def application():
    environ = request.headers
    data = json.loads(request.data)

    # シグネチャ検証(とりあえずマスク)
#    signature = environ['X_LINE_SIGNATURE']
#    hash = hmac.new(channel_secret.encode('utf-8'),
#        data.encode('utf-8'), hashlib.sha256).digest()
#    signature_from_data = base64.b64encode(hash)
#
#    print(signature)
#    print(signature_from_data)
#
    # get request body as text
    content_length = int(environ['CONTENT_LENGTH'])

    # 画像かスタンプを送られた場合
    if 'text' not in data["events"][0]["message"]:
       body = '画像、スタンプは送らないで!'

    # 教えて or おしえてと言われたら自分で探せと返す
    elif 'おしえ' in data["events"][0]["message"]["text"] or '教え' in data["events"][0]["message"]["text"]:
       body = 'オッケーグーグル!\nhttps://www.google.com/'

    # 感謝の言葉を言われたら嬉しいよね
    elif 'ありがとう' in data["events"][0]["message"]["text"]:
       body = 'お役に立てて何よりです'

    # それ以外は、とりあえずオウム返し
    else:
       body = data["events"][0]["message"]["text"]

    for i in data["events"]:
        print(i)
        line_bot_api.reply_message(
            i["replyToken"],
            TextSendMessage(text=body)
        )

    return make_response('ok'), 200

if __name__ == '__main__':
    app.run(host='0.0.0.0', port=8000)

作成後、flaskアプリケーションを起動する

スマホでLINEを起動し、LINEDeveloperのチャンネルに表示されているQRコードを読み込んで友達追加する
(確認していたら、娘からスマホを取り上げられて遊ばれた…)

duとdfでディスク使用が異なる場合の対応

先日、開発用サーバーがDiskFullで停止した。
原因はログの肥大化だったので、logrotateを見直して復旧させたのだけど、
duコマンドとdfコマンドのディスク使用に乖離がありすぎたので、その時に行なった対応をメモ

df -h 
Filesystem            Size  Used Avail Use% Mounted on
/dev/vda2              95G   76G   15G  85% /
tmpfs                 939M     0  939M   0% /dev/shm
du -h /
(中略)
15G /

どうやら、logrotateで圧縮したファイルを握っている残留プロセスがあり、消せないファイルとして握られているようだ。

ls -al /proc/*/fd/* | grep deleted

ls: cannot access /proc/28797/fd/255: そのようなファイルやディレクトリはありません
ls: cannot access /proc/28797/fd/3: そのようなファイルやディレクトリはありません
ls: cannot access /proc/self/fd/255: そのようなファイルやディレクトリはありません
ls: cannot access /proc/self/fd/3: そのようなファイルやディレクトリはありません
l-wx------ 1 root   root   64  3月 25 10:44 2019 /proc/12275/fd/1 -> /var/log/zabbix/zabbix_agentd.log-20181202 (deleted)
l-wx------ 1 root   root   64  3月 25 10:44 2019 /proc/12275/fd/2 -> /var/log/zabbix/zabbix_agentd.log-20181202 (deleted)
l-wx------ 1 root   root   64  3月 25 10:44 2019 /proc/12277/fd/1 -> /var/log/zabbix/zabbix_agentd.log-20181202 (deleted)
l-wx------ 1 root   root   64  3月 25 10:44 2019 /proc/12277/fd/2 -> /var/log/zabbix/zabbix_agentd.log-20181202 (deleted)
l-wx------ 1 root   root   64  3月 25 10:44 2019 /proc/12278/fd/1 -> /var/log/zabbix/zabbix_agentd.log-20181202 (deleted)
l-wx------ 1 root   root   64  3月 25 10:44 2019 /proc/12278/fd/2 -> /var/log/zabbix/zabbix_agentd.log-20181202 (deleted)
l-wx------ 1 root   root   64  3月 25 10:44 2019 /proc/12279/fd/1 -> /var/log/zabbix/zabbix_agentd.log-20181202 (deleted)
l-wx------ 1 root   root   64  3月 25 10:44 2019 /proc/12279/fd/2 -> /var/log/zabbix/zabbix_agentd.log-20181202 (deleted)
l-wx------ 1 root   root   64  3月 25 10:44 2019 /proc/12280/fd/1 -> /var/log/zabbix/zabbix_agentd.log-20181202 (deleted)
l-wx------ 1 root   root   64  3月 25 10:44 2019 /proc/12280/fd/2 -> /var/log/zabbix/zabbix_agentd.log-20181202 (deleted)
l-wx------ 1 root   root   64  3月 25 10:44 2019 /proc/12281/fd/1 -> /var/log/zabbix/zabbix_agentd.log-20181202 (deleted)
l-wx------ 1 root   root   64  3月 25 10:44 2019 /proc/12281/fd/2 -> /var/log/zabbix/zabbix_agentd.log-20181202 (deleted)
l-wx------ 1 apache apache 64  3月 25 10:44 2019 /proc/25517/fd/4 -> /var/www/hoge/log/sqllog/sql_debug.log.1 (deleted)
l-wx------ 1 apache apache 64  3月 25 10:44 2019 /proc/25517/fd/7 -> /var/www/hoge/log/sqllog/sql_debug.log.1 (deleted)
lrwx------ 1 root   root   64  3月 26 10:17 2019 /proc/26788/fd/13 -> /tmp/.ZendSem.LtZNfn (deleted)
lrwx------ 1 root   root   64  3月 26 10:17 2019 /proc/3793/fd/13 -> /tmp/.ZendSem.LtZNfn (deleted)
lrwx------ 1 root   root   64  3月 26 10:17 2019 /proc/3795/fd/13 -> /tmp/.ZendSem.LtZNfn (deleted)
lrwx------ 1 root   root   64  3月 26 10:17 2019 /proc/3943/fd/13 -> /tmp/.ZendSem.LtZNfn (deleted)
lrwx------ 1 root   root   64  3月 26 10:17 2019 /proc/4101/fd/13 -> /tmp/.ZendSem.LtZNfn (deleted)
lrwx------ 1 root   root   64  3月 26 10:17 2019 /proc/4141/fd/13 -> /tmp/.ZendSem.LtZNfn (deleted)
lrwx------ 1 root   root   64  3月 26 10:17 2019 /proc/4157/fd/13 -> /tmp/.ZendSem.LtZNfn (deleted)
lrwx------ 1 root   root   64  3月 26 10:17 2019 /proc/4158/fd/13 -> /tmp/.ZendSem.LtZNfn (deleted)
lrwx------ 1 root   root   64  3月 26 10:17 2019 /proc/4159/fd/13 -> /tmp/.ZendSem.LtZNfn (deleted)
lrwx------ 1 root   root   64  3月 26 10:17 2019 /proc/4164/fd/13 -> /tmp/.ZendSem.LtZNfn (deleted)
lrwx------ 1 root   root   64  3月 26 10:17 2019 /proc/4202/fd/13 -> /tmp/.ZendSem.LtZNfn (deleted)
lrwx------ 1 root   root   64  3月 26 10:17 2019 /proc/4203/fd/13 -> /tmp/.ZendSem.LtZNfn (deleted)
lrwx------ 1 root   root   64  3月 26 10:17 2019 /proc/4204/fd/13 -> /tmp/.ZendSem.LtZNfn (deleted)
lrwx------ 1 root   root   64  3月 26 10:17 2019 /proc/4205/fd/13 -> /tmp/.ZendSem.LtZNfn (deleted)
lrwx------ 1 root   root   64  3月 26 10:17 2019 /proc/4206/fd/13 -> /tmp/.ZendSem.LtZNfn (deleted)
lrwx------ 1 root   root   64  3月 26 10:17 2019 /proc/4207/fd/13 -> /tmp/.ZendSem.LtZNfn (deleted)
lrwx------ 1 root   root   64  3月 26 10:17 2019 /proc/4208/fd/13 -> /tmp/.ZendSem.LtZNfn (deleted)
lrwx------ 1 root   root   64  3月 26 10:17 2019 /proc/4333/fd/13 -> /tmp/.ZendSem.LtZNfn (deleted)
lrwx------ 1 root   root   64  3月 25 10:49 2019 /proc/8789/fd/13 -> /tmp/.ZendSem.LtZNfn (deleted)
lrwx------ 1 root   root   64  3月 25 10:49 2019 /proc/8791/fd/13 -> /tmp/.ZendSem.LtZNfn (deleted)
lrwx------ 1 root   root   64  3月 25 10:49 2019 /proc/8809/fd/13 -> /tmp/.ZendSem.LtZNfn (deleted)
lrwx------ 1 root   root   64  3月 25 10:49 2019 /proc/8810/fd/13 -> /tmp/.ZendSem.LtZNfn (deleted)

それが正常なプロセスであればrestartで容量がドカっと解放されるらしいが、今回は残留プロセスなので、
1. zabbix-agentの再起動
2. PID 25517 をkill
したところ、dfでみた場合の容量が正常値に戻った。

df -h
Filesystem            Size  Used Avail Use% Mounted on
/dev/vda2              95G   15G   76G  17% /
tmpfs                 939M     0  939M   0% /dev/shm
ls -al /proc/*/fd/* | grep deleted
ls: cannot access /proc/29831/fd/255: そのようなファイルやディレクトリはありません
ls: cannot access /proc/29831/fd/3: そのようなファイルやディレクトリはありません
ls: cannot access /proc/29832/fd/255: そのようなファイルやディレクトリはありません
ls: cannot access /proc/29832/fd/3: そのようなファイルやディレクトリはありません
ls: cannot access /proc/self/fd/255: そのようなファイルやディレクトリはありません
ls: cannot access /proc/self/fd/3: そのようなファイルやディレクトリはありません
lrwx------ 1 root  root  64  3月 26 10:20 2019 /proc/28922/fd/13 -> /tmp/.ZendSem.iMYqUr (deleted)
lrwx------ 1 root  root  64  3月 26 10:20 2019 /proc/28924/fd/13 -> /tmp/.ZendSem.iMYqUr (deleted)
lrwx------ 1 root  root  64  3月 26 10:20 2019 /proc/28925/fd/13 -> /tmp/.ZendSem.iMYqUr (deleted)
lrwx------ 1 root  root  64  3月 26 10:20 2019 /proc/28926/fd/13 -> /tmp/.ZendSem.iMYqUr (deleted)
lrwx------ 1 root  root  64  3月 26 10:20 2019 /proc/28927/fd/13 -> /tmp/.ZendSem.iMYqUr (deleted)
lrwx------ 1 root  root  64  3月 26 10:20 2019 /proc/28928/fd/13 -> /tmp/.ZendSem.iMYqUr (deleted)
lrwx------ 1 root  root  64  3月 26 10:20 2019 /proc/28929/fd/13 -> /tmp/.ZendSem.iMYqUr (deleted)
lrwx------ 1 root  root  64  3月 26 10:20 2019 /proc/28930/fd/13 -> /tmp/.ZendSem.iMYqUr (deleted)
lrwx------ 1 root  root  64  3月 26 10:20 2019 /proc/28931/fd/13 -> /tmp/.ZendSem.iMYqUr (deleted)
lrwx------ 1 root  root  64  3月 26 10:20 2019 /proc/28932/fd/13 -> /tmp/.ZendSem.iMYqUr (deleted)
lrwx------ 1 root  root  64  3月 26 10:20 2019 /proc/28933/fd/13 -> /tmp/.ZendSem.iMYqUr (deleted)
lrwx------ 1 root  root  64  3月 26 10:20 2019 /proc/28934/fd/13 -> /tmp/.ZendSem.iMYqUr (deleted)
lrwx------ 1 root  root  64  3月 26 10:20 2019 /proc/28935/fd/13 -> /tmp/.ZendSem.iMYqUr (deleted)
lrwx------ 1 root  root  64  3月 26 10:20 2019 /proc/28936/fd/13 -> /tmp/.ZendSem.iMYqUr (deleted)
lrwx------ 1 root  root  64  3月 26 10:20 2019 /proc/28937/fd/13 -> /tmp/.ZendSem.iMYqUr (deleted)
lrwx------ 1 root  root  64  3月 26 10:20 2019 /proc/28938/fd/13 -> /tmp/.ZendSem.iMYqUr (deleted)
lrwx------ 1 root  root  64  3月 26 10:20 2019 /proc/28939/fd/13 -> /tmp/.ZendSem.iMYqUr (deleted)
lrwx------ 1 root  root  64  3月 26 10:20 2019 /proc/28940/fd/13 -> /tmp/.ZendSem.iMYqUr (deleted)
lrwx------ 1 root  root  64  3月 26 10:20 2019 /proc/28941/fd/13 -> /tmp/.ZendSem.iMYqUr (deleted)
lrwx------ 1 root  root  64  3月 26 10:20 2019 /proc/28942/fd/13 -> /tmp/.ZendSem.iMYqUr (deleted)
lrwx------ 1 root  root  64  3月 26 10:20 2019 /proc/28943/fd/13 -> /tmp/.ZendSem.iMYqUr (deleted)

etcdのクラスタ設定でハマった事まとめ

初めてetcdを触ってみたので、個人的にハマったポイントも含めて備忘録を残します。

環境

Mac on VirtualBox
- CentOS Linux release 7.6.1810 (Core)
- kernel 3.10.0-957.10.1.el7.x86_64
- etcd Version: 3.3.11

インストール

yum でサクッと。

yum -y install etcd

config

/etc/etcd/etcd.conf

ETCD_DATA_DIR="/var/lib/etcd/default.etcd"
ETCD_LISTEN_PEER_URLS="http://192.168.33.10:2380"
ETCD_LISTEN_CLIENT_URLS="http://0.0.0.0:2379"
ETCD_NAME="node01"
ETCD_INITIAL_ADVERTISE_PEER_URLS="http://192.168.33.10:2380"
ETCD_ADVERTISE_CLIENT_URLS="http://192.168.33.10:2379"
ETCD_INITIAL_CLUSTER="node01=http://192.168.33.10:2380,node02=http://192.168.33.20:2380,node03=http://192.168.33.30:2380"
ETCD_INITIAL_CLUSTER_TOKEN="etcd-cluster"
ETCD_INITIAL_CLUSTER_STATE="new"

ここまでは、
http://www.usupi.org/sysad/277.html とか
https://qiita.com/hana_shin/items/602f98bd9b153d22e50c
に記載がある通り。

この状態で、

systemctl enable etcd
systemctl start etcd

として、クラスタの状態を確認しても、なぜかpeerURLs=http://localhost:2380 とボッチ状態になる。

etcdctl member list
8e9e05c52164694d: name=node01 peerURLs=http://localhost:2380 clientURLs=http://192.168.33.20:2379 isLeader=true

解決方法

systemdの設定を見てみる

cat /usr/lib/systemd/system/etcd.service
(中略)
ExecStart=/bin/bash -c GOMAXPROCS=$(nproc) /usr/bin/etcd --name="${ETCD_NAME}" --data-dir="${ETCD_DATA_DIR}" --listen-client-urls="${ETCD_LISTEN_CLIENT_URLS}"

クラスタで起動させるには、

etcd --name node01 --listen-peer-urls http://192.168.33.10:2380 --initial-advertise-peer-urls http://192.168.33.10:2380 --initial-cluster node01=http://192.168.33.10:2380,node03=http://192.168.33.30:2380,node03=http://192.168.33.30:2380

こんな感じの設定を投げてあげる必要があるので、systemdを修正

vim /usr/lib/systemd/system/etcd.service
(中略)
# ExecStart=/bin/bash -c GOMAXPROCS=$(nproc) /usr/bin/etcd --name="${ETCD_NAME}" --data-dir="${ETCD_DATA_DIR}" --listen-client-urls="${ETCD_LISTEN_CLIENT_URLS}"

ExecStart=/bin/bash -c "GOMAXPROCS=$(nproc) /usr/bin/etcd --name ${ETCD_NAME} --listen-peer-urls ${ETCD_LISTEN_PEER_URLS} --initial-advertise-peer-urls ${ETCD_INITIAL_ADVERTISE_PEER_URLS} --initial-cluster ${ETCD_INITIAL_CLUSTER}"

・・・失敗

/var/log/messageを見てみる

Mar 25 16:39:13 node01 systemd: Starting Etcd Server...
Mar 25 16:39:13 node01 etcd: recognized and used environment variable ETCD_ADVERTISE_CLIENT_URLS=http://192.168.33.10:2379
Mar 25 16:39:13 node01 etcd: recognized and used environment variable ETCD_DATA_DIR=/var/lib/etcd/default.etcd
Mar 25 16:39:13 node01 etcd: recognized and used environment variable ETCD_INITIAL_CLUSTER_STATE=new
Mar 25 16:39:13 node01 etcd: recognized and used environment variable ETCD_INITIAL_CLUSTER_TOKEN=etcd-cluster
Mar 25 16:39:13 node01 etcd: recognized and used environment variable ETCD_LISTEN_CLIENT_URLS=http://0.0.0.0:2379
Mar 25 16:39:13 node01 etcd: recognized and used environment variable ETCD_STRICT_RECONFIG_CHECK=true
Mar 25 16:39:13 node01 etcd: recognized environment variable ETCD_LISTEN_PEER_URLS, but unused: shadowed by corresponding flag
Mar 25 16:39:13 node01 etcd: recognized environment variable ETCD_NAME, but unused: shadowed by corresponding flag
Mar 25 16:39:13 node01 etcd: recognized environment variable ETCD_INITIAL_ADVERTISE_PEER_URLS, but unused: shadowed by corresponding flag
Mar 25 16:39:13 node01 etcd: recognized environment variable ETCD_INITIAL_CLUSTER, but unused: shadowed by corresponding flag

EnvironmentFile=-/etc/etcd/etcd.confで読ませている設定が読まれて、、、 but unused??

ググると以下の記事があった
https://qiita.com/kobanyan/items/f8e8a3bd5406e1d290fb
変数展開出来ないのか

環境変数で読み込んでいるし、変なパラメータを外すと正常に動作した
CentOSのパッケージで読み込んだsystemdファイルがそもそも意味をなさなかったのか・・・

vim /usr/lib/systemd/system/etcd.service
#ExecStart=/usr/bin/etcd --name ${ETCD_NAME} --listen-peer-urls ${ETCD_LISTEN_PEER_URLS} --initial-advertise-peer-urls ${ETCD_INITIAL_ADVERTISE_PEER_URLS} --initial-cluster ${ETCD_INITIAL_CLUSTER}
ExecStart=/bin/bash -c "GOMAXPROCS=$(nproc) /usr/bin/etcd"

改めてクラスタメンバーの確認

etcdctl member list
254ec0e332be2d7d: name=node01 peerURLs=http://192.168.33.10:2380 clientURLs=http://192.168.33.10:2379 isLeader=true
5ddb7be38d856804: name=node02 peerURLs=http://192.168.33.20:2380 clientURLs=http://192.168.33.20:2379 isLeader=false
9cb2cdf44208202b: name=node03 peerURLs=http://192.168.33.30:2380 clientURLs=http://192.168.33.30:2379 isLeader=false

問題なさそう

子供のスマホデビューの時に行なった事

本日、小学6年生の息子にスマホを買って上げました。
子供にスマホを持たせるのは賛否両論がありますが、今は部活の連絡もLINEで連絡が回ってくる時代なので、我が家では「まだ早い!」と突っぱねるのでは無く、子供にネットリテラシーなどを覚えて貰うきっかけになればと思い、持たせることにしました。

ですが、そのままスマホを子供に渡すのは不安感が大きかったので、
・ スマホのルール
・ システム的な制限
の2つを掛け合わせて運用してみる事にしました。

スマホのルール

色々なサイトを参考にしましたが、基本的にはスマホ18の約束を真似て作っています。
作成したスマホルール

我が家のルールは、緩い方だと思います。
そこは、子供への信頼や、後述するシステム的な制限を入れているというのもあります。

何故こんなルールを作る必要があるのか?
子供を制したいのでは無く、自由にさせてあげたい。
だからこそ、守って欲しい最低限のルールしか書いていません。

また、我が子は、「例えば・・・」の話をした方が理解しやすいみたいで、沢山例を上げました。

そこをちゃんと理解して貰わないと、個々の内容に行く前に、
「俺の事を信用していないの!?」となります。

システム的な制限

と言っても大げさな物ではありません。

我が子に買って上げたスマホは、Androidのミドルクラス(3万〜4万)のスマホです。
(iphoneが欲しがっていましたが、スマホデビューで7万円以上もする機種代を払うのは勿体無さすぎ)

Androidなので、今年から日本で使えるようになった「google ファミリーリンク」を使いました。

ファミリーリンクで、とりあえずは以下の制限を行なっています。
⑴ 平日は22:00 – 6:00 はスマホの強制ロック
⑵ 金曜日、休日は23:00 – 6:00 はスマホの強制ロック
⑶ プリインンストールだろうがシステムアプリだろうが、使わなくていいアプリの無効化
⑷ Playストアの購入リクエスト
⑸ 可能な限り、子供向けコンテンツのみ表示

(1)(2)は、1週間のスケジュール設定が行えますが、祝日や冬休みの対応は、変更が必要です。
変更は、親のスマホにインストールしたファミリーリンクアプリから出来ます。

(3)は、文字通り強制的に画面をロックし、緊急電話しか行えなくなります。
子供がパスワードや指紋認証でロックを解除した場合、以下のように表示されるので子供にも分かりやすいですね

(4)は、子供がPlayストアでアプリをインストールしたい場合、保護者に承認を送る事が出来ます。
何が良いかというと、

「パパ、◯◯ってゲームインストールしておいて!」
「疲れてるから週末にやって上げるよ〜」
「それじゃ遅いよ!!」

という嫌われポイントが少なくなります。
子供からリクエストが来たら、電車の中だろうと確認して「承認」をすれば良いだけですからね。
有料のコンテンツは、奥さんに確認してから承認、却下をするだけですし。

⑸ 可能な限り、子供向けコンテンツのみ表示
恐らく、chromeとかgoogleのアプリ限定で機能するのではないでしょうか?
実際、LINEのトーク内のURLをクリックしてWebブラウザを起動した場合、制限を行なっていてもアダルトサイトなど見えてしまう状態です。

ネットワーク周りのフィルタリングを、もう少し強化する為に、WifiのアクセスポイントをIO-DATAのWN-AX2033GR2に変更しました。
このモデルは、L7での簡易フィルタリング機能が備わっているらしく、

従来モデルでご好評の悪質サイトやフィッシングサイトをフィルタリングする「ネットフィルタリング」機能(5年無料)や、お子様の利用時間を制限する「ペアレンタルコントロール」機能はもちろん、パソコンやスマートフォン、ゲーム機など、Wi-Fi接続端末を管理できる「Wi-Fiマモル」機能を搭載。よりセキュリティ効果を高めることができます。

との事です。

こちらはネットワークでの制限になるので端末のMACアドレスが必要になります。
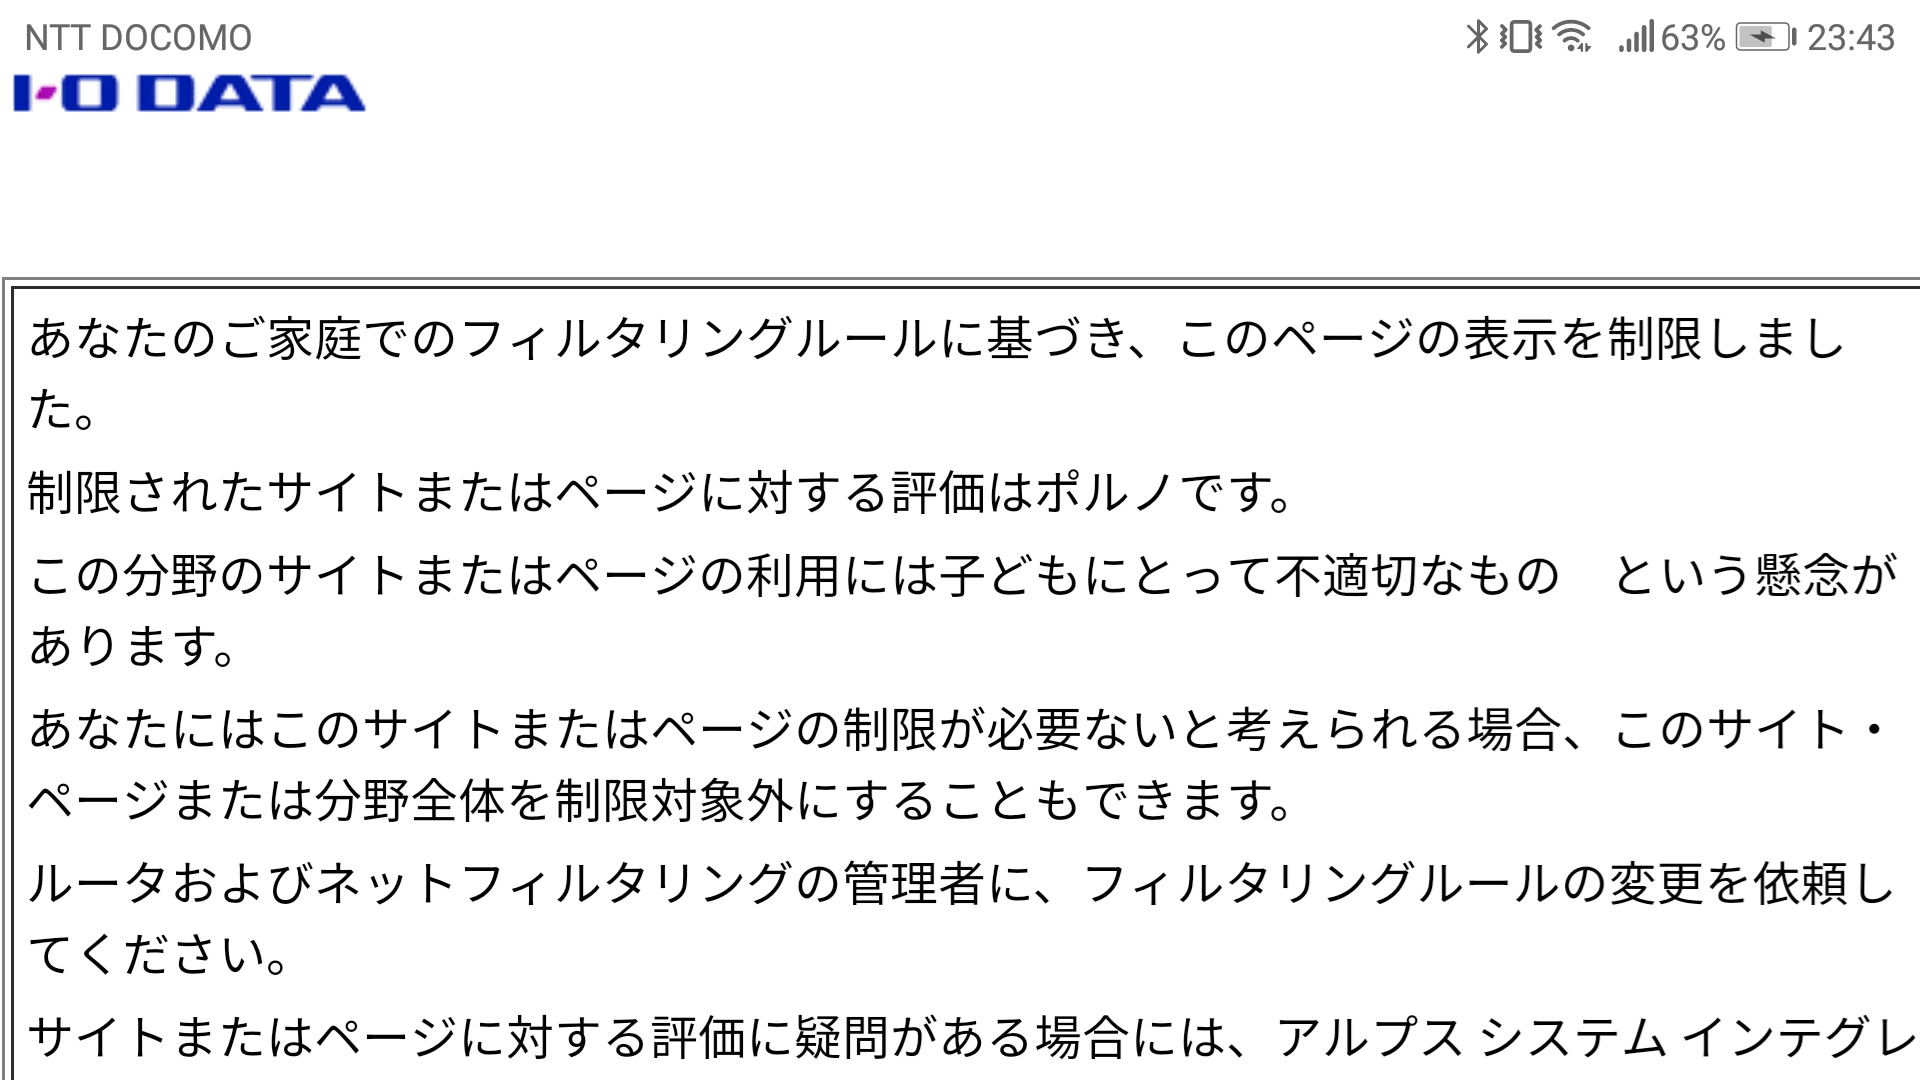
設定してみると不適切なコンテンツを閲覧しようとした場合に、Wifiのエラー画面に遷移します。

python3.7のソースインストール

cd /usr/local/src/

wget https://www.python.org/ftp/python/3.7.1/Python-3.7.1.tgz

tar zxvf Python-3.7.1.tgz

cd /usr/local/src/Python-3.7.1

yum groupinstall 'Development Tools'

# ncurses-develは、bpythonを使わないなら不要
yum install openssl-devel libffi-devel ncurses-devel

./configure prefix=/usr/local/python3.7;make;make install

Gsuiteユーザーのメール容量をAPIから取得する

これはAdventure Advent Calendar 2018の8日目の記事です。

ユーザーとしてAPIを使って、Gmailのメールを方法はいくつか見つけましたが、管理者視点での操作をしている情報が少なかったので、備忘録として残します。

特定のユーザーがメールが一杯になってしまうと、送信側であるお客様や取引先に迷惑が掛かるので、Gsuiteの管理者の視点として
GsuiteユーザーのGmailの容量(標準だと30GB)の利用統計を取りたい。
というのがあると思います。

ですが、Thunderbirdなどのメーラーを使ってGmailを使っている人は、今の容量を知る術がありません。

そこで、日時でGsuiteの全ユーザーの情報を取得するスククリプトを書いて、日時で回して運用する事にしました。

作成したコードは以下になります。

※事前に、
 ・ Gsuite APIの有効化(https://support.google.com/a/answer/60757?hl=ja)
 ・ OAUTHを使うユーザーのGsuite内権限の割り当て(https://support.google.com/a/answer/142566)
・ OAUTH認証設定(https://console.cloud.google.com/apis/credentials/consent?)
を行なって下さい。

コード

#!/bin/env python3/7

import os
from datetime import datetime, date, timedelta
import httplib2
from apiclient import discovery
from oauth2client import client, tools
from oauth2client.file import Storage
from bigquery import get_client
import requests

in_date = datetime.today()
in_date = datetime.strftime(in_date - timedelta(hours=48), '%Y-%m-%d')

def main():
    try:
        import argparse
        parser = argparse.ArgumentParser(parents=[tools.argparser])
        flags = parser.parse_args()
    except ImportError:
        flags = None

    # 認証情報を格納するディレクトリ「.credentials」の設定。ディレクトリが無い場合は作成
    credential_dir = os.path.join(os.path.expanduser('~'), '.credentials')
    if not os.path.exists(credential_dir):
        os.makedirs(credential_dir)

    # 認証ファイルのパスを設定と読み込み
    credential_path = os.path.join(credential_dir, 'admin-directory_v1.json')
    store = Storage(credential_path)
    credentials = store.get()

    # 認証ファイルが無い場合は作成
    if not credentials or credentials.invalid:

        # 使用する機能の範囲を設定
        scopes = [
            'https://www.googleapis.com/auth/admin.reports.usage.readonly',
            'https://www.googleapis.com/auth/admin.reports.audit.readonly'
        ]

        # 認証キーの設定(~/.ssh/gsuite-admin.json)
        secret_key = os.path.join(os.path.expanduser('~'), '.ssh', 'gsuite-admin.json')

        # 認証キーから認証処理を行うクラスのインスタンスを生成
        flow = client.flow_from_clientsecrets(secret_key, scopes)

        # アプリケーションの名前
        flow.user_agent = 'Gmail Check'

        if flags:
                credentials = tools.run_flow(flow, store, flags)
        else:
            credentials = tools.run(flow, store)
        print('証明書を保存しました: ' + credential_path)

    # 認証を行う
    http = credentials.authorize(httplib2.Http())
    app_report_service = discovery.build('admin', 'reports_v1', http=http)

    # GsuiteのAPIを実行
    results = app_report_service.userUsageReport().get(userKey='all',date=in_date).execute()

    for i in extraction(results) :
        print(i)

#
# GSuiteのAPI結果から必要な情報を抜く
#
def extraction(results):
    recodes = []
    for i in results['usageReports']:
        recode = {}

        # レポート日
        recode["day"] = in_date

        # メールアドレス
        recode["email"] = i['entity']['userEmail']

        for l in i['parameters']:
            # 最終アクセス日時
            if 'gmail:last_access_time' in l["name"]:
                last_access = datetime.strptime(l["datetimeValue"], '%Y-%m-%dT%H:%M:%S.000Z')
                last_access = datetime.strftime(last_access - timedelta(hours=9), '%Y-%m-%d %H:%M:%S')
                recode["last_access_time"] = last_access

            # 氏名
            elif "accounts:admin_set_name" in l["name"]:
                recode["name"] = l['stringValue']

            # アカウントに割り当てられた容量(Gmailだけの値は無さそう)
            elif "accounts:total_quota_in_mb" in l["name"]:
                recode["total_mb"] = l['intValue']

            # gmailの使用量
            elif "accounts:gmail_used_quota_in_mb" in l["name"]:
                recode["usage_mb"] = l['intValue']

            # アカウントの使用量(パーセンテージ)
            elif "accounts:used_quota_in_percentage" in l["name"]:
                recode["usage_percent"] = l['intValue']

        recodes.append(recode)

    return recodes

結果

{'day': '2018-12-05', 'email': 'メールアドレス1', 'name': '名前1', 'usage_mb': '13793', 'total_mb': '30720', 'usage_percent': '44', 'last_access_time': '2018-12-05 22:59:14'}
{'day': '2018-12-05', 'email': 'メールアドレス2', 'name': '名前2', 'usage_mb': '1550', 'total_mb': '30720', 'usage_percent': '5', 'last_access_time': '2018-12-05 22:59:12'}
{'day': '2018-12-05', 'email': 'メールアドレス3', 'name': '名前3', 'usage_mb': '7107', 'total_mb': '30720', 'usage_percent': '23', 'last_access_time': '2018-12-05 22:59:13'}
{'day': '2018-12-05', 'email': 'メールアドレス4', 'name': '名前4', 'usage_mb': '6211', 'total_mb': '30720', 'usage_percent': '20', 'last_access_time': '2018-12-05 22:59:14'}
{'day': '2018-12-05', 'email': 'メールアドレス5', 'name': '名前5', 'usage_mb': '30202', 'total_mb': '30720', 'usage_percent': '98', 'last_access_time': '2018-12-05 22:59:45'}

注意

in_date = datetime.today()
in_date = datetime.strftime(in_date - timedelta(hours=48), '%Y-%m-%d')

取得対象日時の指定です。
Gsuiteのレポートは、リアルタイム性はありません。
12/8に前日分の情報を取得しようとすると、スクリプトを回すと以下のように怒られます。

googleapiclient.errors.HttpError: <HttpError 400 when requesting https://www.googleapis.com/admin/reports/v1/usage/users/all/dates/2018-12-07?alt=json returned "Data for dates later than 2018-12-06 is not yet available. Please check back later">

メールだけの正確なチェックではなありませんが、usage_percentが高いユーザーに連絡を行い、事前にデータの整理を行なってもらうように促せます。
SSH接続時にMacのターミナルのプロファイルを切り替える

何故、YAMAHA機器の文字コードはsjis何だろう・・・

と嘆いていましたが、MacのターミナルからSSHの接続先でプロファイルを切り替える方法を記載します。

itermでも同様の事が行えるようですが、sshのconfigのHostname情報と完全一致しないとプロファイルの切り替えがダメそう。

iTerm2でSSHログイン先別にプロファイルを自動的に切替えて事故防止する方法

192.168.x.xはYAMAHAしかないし、複数のL2スイッチ、L3スイッチ、ルーターとconfigを書きたくないんじゃー!という方向け。

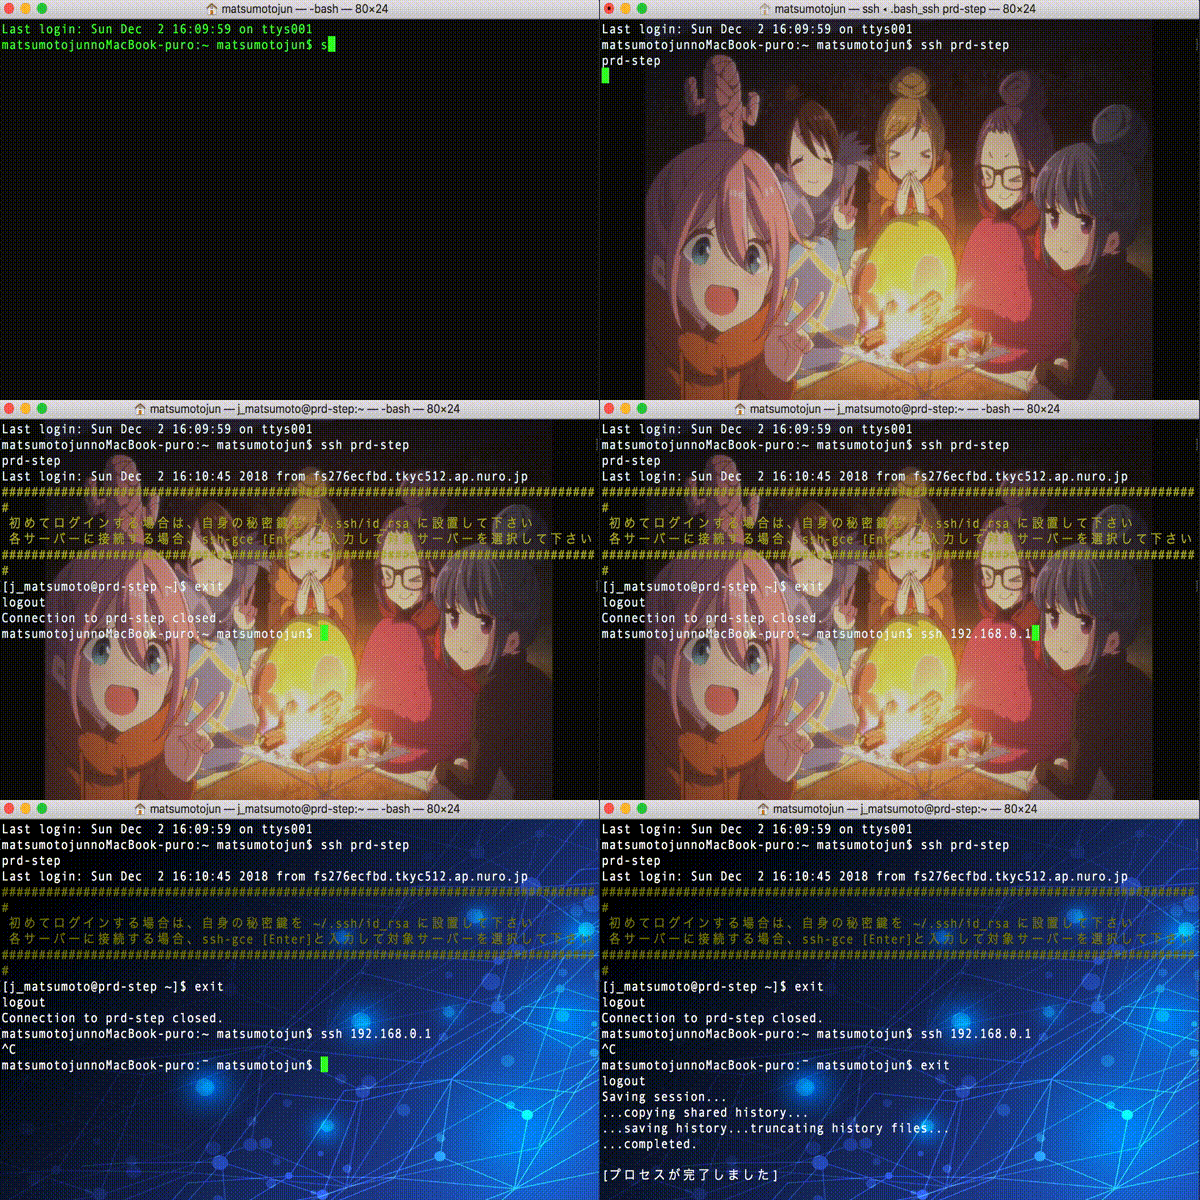
  1. ターミナルのプロファイルを好きに作成します。
    今回は、
    「honban」 ・・・ Homebrewから複製。背景をゆるキャン△の画像に差し替え
    「network」 ・・・ Homebrewから複製。背景は拾ったネットワークチックな画像に差し替え。文字コードをsjinに変更。

  2. ~/.bash_sshなどに以下のスクリプトを記載します。

#!/bin/bash

# SSH接続先に、「prd」という文字列が入ってたら、本番環境とみなしてターミナルの「Honban」プロファイルを適用する
if [[ `echo $@ | grep 'prd'` ]] ; then
   /usr/bin/osascript -e "tell application \"Terminal\" to set current settings of first window to settings set \"Honban\""
   echo $@
   /usr/bin/ssh -F ~/.ssh/config $@

# SSH接続先に、「192.168」もしくは「172.20」のサブネットであれば、ターミナルの「network」プロファイルを適用する
elif [[ `echo $@ | egrep '192.168|172.20'` ]] ; then
   /usr/bin/osascript -e "tell application \"Terminal\" to set current settings of first window to settings set \"network\""
   /usr/bin/ssh -F ~/.ssh/config $@

# 上記に該当しない接続先は、Homebrewプロファイルを適用する
else
   /usr/bin/osascript -e "tell application \"Terminal\" to set current settings of first window to settings set \"Homebrew\""
   /usr/bin/ssh -F ~/.ssh/config $@
fi

実行権限を付けるのを忘れないように。

chmod +x ~/.bash_ssh
  1. .bash_profileで、sshコマンドへのaliasを設定します。
    最終行に以下を追記します。
alias ssh="~/.bash_ssh $@"

これで、itermのプロファイル切り替えとほぼ同等の事が出来るようになります。
違う点は、sshで接続終了後「ターミナルのデフォルトのプロファイル」に戻らないのは美しくありませんが、他のサーバーに繋ぐと改めてプロファイルが適用されますので、あまり気にしない事にします。

Mac+python3.7でSSL: CERTIFICATE_VERIFY_FAILEDが発生する場合の対応

BeautifulSoup4を使った時に発生したエラー

Traceback (most recent call last):
  File "/Library/Frameworks/Python.framework/Versions/3.7/lib/python3.7/urllib/request.py", line 1317, in do_open
    encode_chunked=req.has_header('Transfer-encoding'))
  File "/Library/Frameworks/Python.framework/Versions/3.7/lib/python3.7/http/client.py", line 1229, in request
    self._send_request(method, url, body, headers, encode_chunked)
  File "/Library/Frameworks/Python.framework/Versions/3.7/lib/python3.7/http/client.py", line 1275, in _send_request
    self.endheaders(body, encode_chunked=encode_chunked)
  File "/Library/Frameworks/Python.framework/Versions/3.7/lib/python3.7/http/client.py", line 1224, in endheaders
    self._send_output(message_body, encode_chunked=encode_chunked)
  File "/Library/Frameworks/Python.framework/Versions/3.7/lib/python3.7/http/client.py", line 1016, in _send_output
    self.send(msg)
  File "/Library/Frameworks/Python.framework/Versions/3.7/lib/python3.7/http/client.py", line 956, in send
    self.connect()
  File "/Library/Frameworks/Python.framework/Versions/3.7/lib/python3.7/http/client.py", line 1392, in connect
    server_hostname=server_hostname)
  File "/Library/Frameworks/Python.framework/Versions/3.7/lib/python3.7/ssl.py", line 412, in wrap_socket
    session=session
  File "/Library/Frameworks/Python.framework/Versions/3.7/lib/python3.7/ssl.py", line 853, in _create
    self.do_handshake()
  File "/Library/Frameworks/Python.framework/Versions/3.7/lib/python3.7/ssl.py", line 1117, in do_handshake
    self._sslobj.do_handshake()
ssl.SSLCertVerificationError: [SSL: CERTIFICATE_VERIFY_FAILED] certificate verify failed: unable to get local issuer certificate (_ssl.c:1051)

During handling of the above exception, another exception occurred:

解決策:

$ /Applications/Python\ 3.7/Install\ Certificates.command

参考:
https://qiita.com/orangain/items/0a641d980019fd7e0c52

最新バージョンのgitをインストールする

最新バージョンはここから確認する

環境はGCPのCentOS7

yum groupinstall 'Development Tools'
yum -y install zlib-devel perl-ExtUtils-MakeMaker

cd /usr/local/src
wget https://mirrors.edge.kernel.org/pub/software/scm/git/git-2.9.5.tar.gz
tar zxvf git-2.9.5.tar.gz 
cd git-2.9.5
./configure --prefix /usr/local/git-2.9.5
make
make install
git --version
git version 2.9.5